Beauty Favourites | September 2014

Wednesday 8 October 2014

September Beauty Favourites

The "warmest" welcome to FALL! The season of cozy sweaters, hot chocolate, scarves, colourful leaves, long nights & crisp air.  With that comes an official farewell to summer - I will miss it terribly but am pumped to make the best of fall.

Any who enough with the blab and on to last month's (September) beauty favourites. They are mostly new favorites and old discoveries. So here we go:


1. L'Oreal Voluminous Miss Manga Mascara:


I'm already a huge fan of the Original L'oreal Voluminous Mascara and this one is right up there with it! The best thing about it is that it adds both VOLUME AND LENGTH! I usually always have to use 2 mascaras, 1 for adding volume and another for adding length. So, this replaces 2 mascaras for me. It's also easy to apply and even easier to remove. I really hate mascara's that glue onto your lashes and don't come off without loosing a couple of (valuable) lashes - but no problem with this one. It doesn't feel too heavy on the lashes either. It does not weight them down, no matter how much you layer on (unlike some mascaras). It doesn't clump up too much on me either (it may clump the tiniest bit but in a good way that adds volume). The top of tip also makes it easy to apply mascara to your bottom lashes too.

But I don't get the whole 360 degree tip?! I just use it as I would any mascara. Also, don’t fall for the exaggerated, cartoon-ized “manga effect”. I'd say ANY MASCARA layered on about 50 times would look like those manga or spider lashes you see on the ads. So the whole "manga" lash thing isn't the selling point for me. Besides that I do love this mascara for volumizing + lengthening without the clump.

2. Organix Nourishing Coconut Milk Anti Breakage Serum


First of all, let me just say that this literally smells like the sweetest piƱa colada there is. I just discovered this product this month and it has really been giving my dry & brittle hair a boost. I use this every time I wash my hair. I apply it on slightly air dried hair that is still damp. I apply a dime size amount to my medium length hair (but no where near my roots!). It adds a nice smoothness, softness and shiny look and feel to it. Its hard to say if it does anything for “anti-breakage” because well I didn't really notice any difference (nor did I buy it for the anti-breakage aspect). Though I'm really enjoying this product, I'd still really like to find a product that does with this does AND acts as a detangler/leave-in-conditioner (Suggestions, please?).

3. MAC Woodwinked eyeshadow:


A rediscovery of an "old but gold" favourite. It is a dirty brownish/golden colour. It isn’t too shimmery or glittery but has a nice sheen and layers on nicely. It is the perfect colour to use in a rush when you don't have time to do your eyes. Sometimes I just use this as a single colour on my lids or simply add a darker brown in the crease and I'm DONE. I love how versatile the colour is, as it can be used for everyday and also for a more glam look.

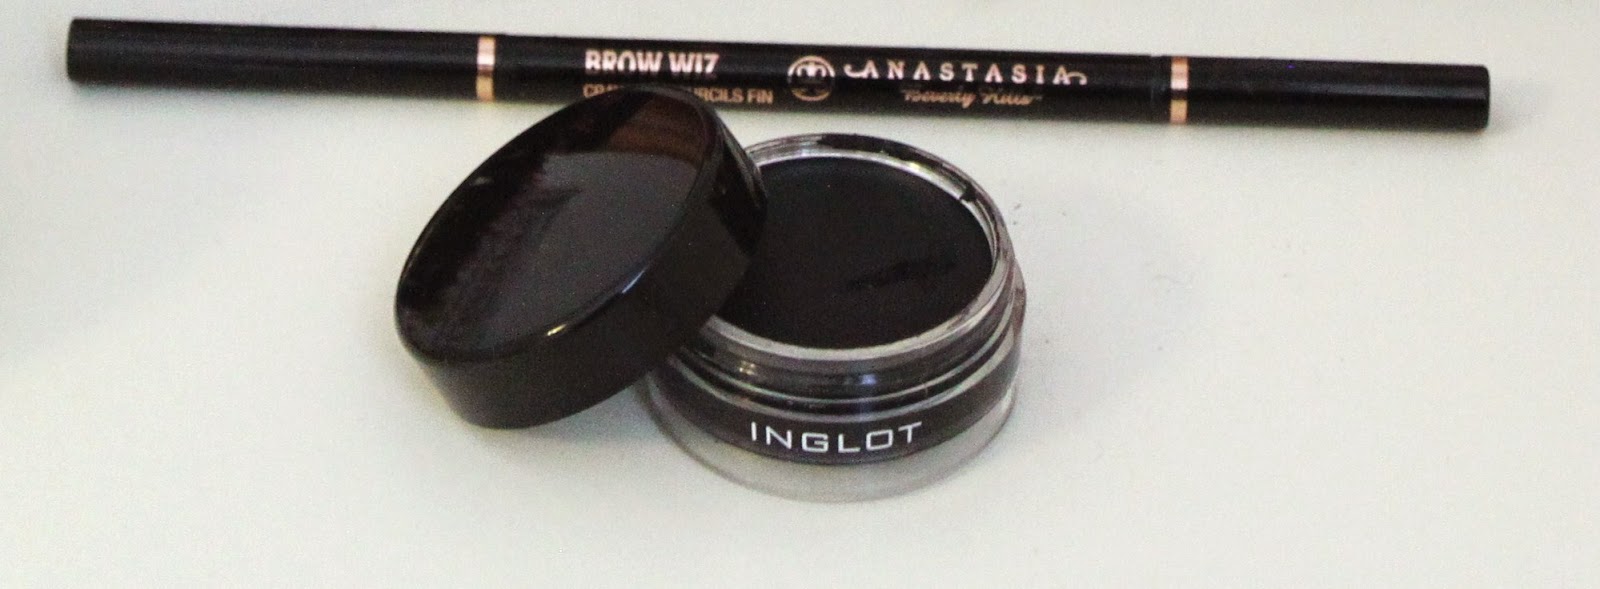
4. Inglot Black Gel Liner #77:


 I’ve already done a whole post declaring my love for this liner! It is smooth, creamy, applies like a dream, and doesn’t smudge or budge all day. And not to mention it is SO much more affordable than higher end gel liners (without comprising on the quality). For more pictures & blab, you can read my full post here.

5. Anastasia Beverly Hills Brow Wiz in Dark Brown:


This one is for my girls that don't have 15 minutes every morning to do their brows! It is so easy and convenient to use. It looks so natural and lasts all day long. It's hard to over do it because it applies so lightly. My favourite thing about this product is that it is really ALL you need to do your brows - no need for an angled eyebrow brush, a spoolie, or a sharpener. You can read all about it with pictures on my full post here.

What are your last month's beauty favourites?
Read Full Post...

Anastasia Beverly Hills Brow Wiz Review

Tuesday 30 September 2014

anastasia beverly hills brow wiz in dark brown

Anastasia Beverly Hills has definitely taken the "eye-brow world" by storm. I think its safe to say that she has revolutionized the entity of "eyebrow" with all the various eyebrow products she offers. Now, it isn't the most affordable product out there "just" to fill/draw your brows - but her brow line seems to be an absolute HIT. So, clearly I had to be the bandwagon-jumper that I am and give it a shot (#NoShameInMyGame).

With the large range of ABH brow products out there, it took me a while to carefully choose the one right for me. I initially had my heart set on the dip brow pomade but I ended up opting for the Brow Wiz. This was for the sole purpose of convenience and easy use, since I am typically an on-the-go type of makeup girl 80% of the time.

Currently, my eyebrows are slightly on the thicker and full side, and so I only need define them a bit. Before purchasing the brow wiz, all I used was the good old ELF eyebrow duo kit (dark brown) for about a year. It did the job well, but it wasn't the absolute best for on-the-go.

Any who, lets get on to the details of the brow wiz, shall we...

anastasia beverly hills brow wiz in dark brown


PACKAGING:


The product comes in a sleek black and gold dual ended "pencil". The applicator side comes with with a automatic very fine pencil-like tip. You can turn it to dispense more product, so no sharpening necessary at all. The tip is also very firm/sturdy. I noticed that the tip still stays pointed no matter how much you use it, so no worries there.

The other side of the pencil is a good quality spoolie that can be used to brush out your brows. I am so thankful for the spoolie on the other end because I'm tired of using (...and losing) disposable mascara wands to brush out my eyebrows. No need to buy a sharpener, spoolie, or even an angled brush for application. So you get to save some money there and who doesn't love that!?


COLOUR:


I went with the colour dark brown (formerly known as brunette) for my black eye brows. I feel that it is the perfect colour for my black hair that blends in just right. Most girls that I've seen (on youtube, blogs, etc.) with black hair, either opt for the shade dark brown or ebony (1 shade darker). My eyebrows are naturally very dark black and bold, therefore I went with dark brown so that my brows don't end up looking too overpowering.

anastasia beverly hills brow wiz in dark brown
Left: Light swatch of Dark Brown | Right: Heavy swatch of Dark Brown (depends on pressure applied on pencil)

APPLICATION:


The brow wiz is a BREEZE to use. Of course, this depends on how much drawing on or filling in you've got to do on your brows. But, I will say that it is not easy to make mistakes or over do it with this because it applies very lightly. The more pressure you apply on the pencil, the deeper the colour shows up.

My eyebrows don't require too much filling, so what I do is probably really minimal. But here's what I do anyways:

To start off, I do very gentle strokes (without pushing hard) to fill in my inner brow. I simply make light strokes in a upward motion to resemble fine hairs (where needed). Then, on the outer brow (arch to the end), I apply slightly more pressure to define this area (following the natural shape of my eyebrow). Lastly, I just fill in any sparse areas with light strokes. I then finish by simply flipping the pencil over and brushing the brows with the spoolie to blend out any harsh lines.

Anastasia Brow Wiz Before and After
I know, it looks like I've done NOTHING. But trust me, I DID fill them in! (I just don't like them too defined/bold).  If you look closely in the After shot, the eyebrow is more defined than before.


WEAR-ABILITY:

 
It looks so natural, just like your own brows. It really blends right in and resembles your natural hair (given you've gotten the right colour). It's really hard for it to look over-done due to the light applicator as well. It also lasts all day long until you remove your makeup. I barely noticed any wearing off.


PROS

  • Super easy and convenient to use
  • Comes with spoolie on other end to brush brows
  • Automatic pencil so no sharpening needed
  • Tip is always firm and precise pointed
  • Large range of colours to choose from
  • Looks very natural
  • Lasts all day

CONS

  • Pricey at $27 CAD

If you're thinking of getting an ABH brow product, I'd totally recommend this one - especially if you don't have a whole 15 minutes to spare  everyday to do your brows. It so simple and easy to use. You don't need to go buy a bunch of different products (sharpener, anged brush, spoolie, etc.) just for your brows.  I think it would work with all types of brows from thick to thin - but would require more/less work accordingly. So yup, I'm a "ABH brow convert"!

You can buy it online here at Sephora.

What's your favourite brow product?  
Read Full Post...

Inglot Gel Liner #77 Review

Friday 5 September 2014


I've DESPERATELY been wanting to try out the brand Inglot ever since I’ve heard about it. It's hard to get a hold of as seems to be sold literally EVERYWHERE except here in Canada! Well, no I'm lying. In Canada it is sold only in Montreal (8 hours away from me) or online (boo for shipping fees!) - so basically it isn't the easiest to get your hands on for us Canadians.

The number 1 item on my Inglot wish-list for just about AGES is their AMC Eye Liner Gel #77 (Black). I’ve heard way too many rave reviews on this liner and many even consider it their Holy Grail. So obviously I just had to have it! Anyways, I FINALLY managed to pick it up in the States a few weeks ago ( YAYA!) at a Macy's. Of course, I used it immediately and countless times since and have got to say that it is absolutely FAB.

COLOUR & CONSISTENCY


It is the truest, deepest, blackest black there is. It is a vibrant black that kind of “pops”. The finish is somewhere between satin and matte, which is why the black doesn’t look flat and dull. The consistency of the liner is unlike other gel liners. It is so rich, creamy and “wet-like”. This allows the product to glide on oh-so-smoothly. Because it is so creamy and not dry, there’s not need to pull or tug when applying along the lash line. The popular Maybelline Eye Studio Gel liner, on the other hand, is a bit on the drier and duller side compared to the Inglot gel liner.


Left:  Maybelline Eye Studio is a duller black (if you look closely) | Right: Inglot Gel liner on Right is a vibrant black


APPLICATION & LONGEVITY


Despite the creamy and wet consistency, this baby dries SUPER fast when applied. I'm talking MILLISECONDS! This is both a pro and a con to me. It is a pro because it won’t smudge and there's no need to wait for it to dry. The con is that, it is hard to reverse or fix a mistake once the liner is set. I don’t have the steadiest hands when applying eyeliner and do make mistakes especially when in a rush. You can't simply rub it off with your fingers or tissue and start over. The best way around this that I know is to use a dry cotton swab (Q-tip) and rub off your mistake (it usually does work for me if I act fast).

The lasting power of this liner is AMAZING. And yes, even without an eye-primer. I never use a primer with eyeliner (only with shadows). Most drugstore eye-liners (gel, liquid or pencil) are almost completely rubbed off in a couple of hours on my lids. Especially when I’ve done a winged liner, the outer wing tends to be the first to disappear. But NOT WITH THIS! - I was so impressed with just how long this liner lasted and still looked good. Even the wing was still exactly in place. Overall, there is very minimal wearing-off even after several hours. It will stay on until you remove it with a quality eye-makeup remover, as doesn't wash off with just water.

Inglot Gel Liner #77 Applied

PRICE & PACKAGING


You'd think this liner would be expensive like all the other gel liners up there, but it is actually super affordable at just $12 USD. It costs significantly less than gel liners by MAC, Bobbi Brown or MakeupForever.

You also get a whole lot of product in this little container. It contains 5.5 grams whereas the Maybelline Gel Liner has 3 grams. As for the packaging, it comes in a very light-weight plastic container.Other gel liners I've seen generally come in more of a sturdy, heavier, glass container. I feel that the plastic container is a little on the cheap side but I’m not bothered as long as the product inside is good (which it is!).

Inglot Gel Liner has 5.5 grams and Maybelline EyeStudio Gel liner has 3 grams

Below is a quick run down of the pros and cons of this liner. The pros definitely outweigh the cons.
.

Pros:


-    True, vibrant blackest black
-    Creamy consistency
-    Glides on smoothly
-    Dries super fast
-    Very long wearing
-    Lots of product at 5.5 grams
-    Very affordable at $12 USD


Cons:


-    Not easily available in Canada (except in Montreal or Online)
-    Troublesome to fix mistakes as it dries super-fast

You can buy it here.

It goes without saying, but this has become my new favourite Black Gel Liner! 

What's your favourite liner?
Read Full Post...

Mini USA Beauty Haul

Tuesday 26 August 2014

usa-beauty-haul

So I had a bit of a short, spontaneous & much needed vacay down south to America (Chicago) a few weeks ago with the fam. LOTS of eating out & shopping sums it up! Though I thought I'd go HAM on the shopping, I decided to be more for a stingy shopper this time around. I decided to ONLY buy beauty products that were either a.) not easily available in Canada or b.) were just cheaper to buy there. As my fellow Canadians already know, there are TONS of beauty products/brands available in America that we are simply deprived of here in Canada. #CanadianPainsMuch.

I wish I could've brought back some of Chicago's deep dish pizza back with me too. WAH :' ( But Anyways...

These are all my USA beauty related buys:

Aztec Secret Indian Healing Clay: 
 This Clay is INCREDIBLE! I've used it only once so far and it made my skin look and feel so much more clean, clear and bright. It pulled out all that blackhead gunk around my nose all in 1 use. It truly DOES live up to the hype. It is meant for deep pore cleansing and is described as the "World's Most Powerful Facial" (don't know about that but it did work amazingly with my first use). So glad I picked up the biggest jar they had. (Purchased from Whole Foods)

Real Techniques Powder Brush: 
 I’ve literally waited ALL year to pick up this brush! I’ve only ever spotted the RT brush sets in Canada (Walmart, Winners), so I waited it out until an America trip to pick up some  individual brushes. It’s so big, fluffy, super-soft and picks up the perfect amount of powder to apply. (Purchased from Ulta)

Real Techniques Stippling Brush: 
Another RT brush I’ve been eyeing for just about EVER. I’ve used it a few times already to apply my foundation (MAC F & B) and it blended in so flawlessly. I also used it to apply powder blush and my gosh! It’s the perfect size for blush and picks up just the right amount (perfect to save yourself from over done blush). (Purchased from Ulta)

Real Techniques Setting and Stippling Brush


Not Your Mother's Girl Powder: 
I’ve been desperately wanting (& needing) a hair powder to get even an ounce of volume in my hair without the tease. I've heard tons of rave reviews on this powder so I picked it up, as this brand is not available in Canada (BOO!). Anyway, my hair is limp, lifeless and lies very flat to my head so I need all the help I can get. I used it once already and it did instantly lift my roots and add some volume. Not it wasn't' that va-voooooom kinda volume (nor was I expecting it) but it did give my flat hair a boost. Excited to use this more often and update. (Purchased from Walmart)

Tangle Teezer Compact Styler: 
My hair is always a knotty mess. It's so prone to tangles even an hour after thoroughly brushing through. De-tangling is always a painful process. I’ve wanted the tangle teaser since ever but I thought it was “just hype”. But oh boyyyy, does it work! It is meant to easily detangle hair. I've used it a few times already and LOOVE IT! No pain, no tugging and no significant hair fall and yes it DOES detangle your hair. It even works well on slightly damp hair too. (Purchased from Target)

usa-hair-products

Spornette Little Wonders Teasing Brush:
I’ve never been one for “teasing” my hair out of fear of damaging my brittle hair further. But I still really wanted one to use for special occasions and such. I have not used this brush yet, but I have heard great things about this particular brush. Looking forward to try it and fake some big, voluminous hair. (Purchased from Ulta)

JR Liggets Shampoo Bar (Damaged Hair Formula): 
I’ve wanted this shampoo bar ever since FarahDhukai suggested this months ago! It’s a natural and simple shampoo bar mainly made up of a number of quality oils (better/healthier than your average shampoo). I've used it a few times and it's already a love. It did lather up a bit and cleaned my hair thoroughly. I had deep conditioned my hair with Almond Oil before using this and YES, it washed it all RIGHT OUT. Ps. You can read a bit about my No-Sham"poo" Experience here. (Purchased from Whole Foods)

Inglot-and-Anastaisa-Products

Anastasia Beverly Hills Brow Wiz in Brunette/Dark Brown:  
After some debate, I decided on the brow wiz over the dip-brow pomade and super glad I did! I’m more of a “on to go” makeup kind of girl and so this brow product is perfect for me. After using it a few times I can say its so easy to use, a little goes a LONG way and the spoolie a tht end is so convenient. The brow wiz has been on my wishlist since ever and since it was cheaper to pick this up in America, I did. (Purchased from Ulta)

Inglot Eyeliner Gel 77
My asbolute favourite purchase of all from my USA Haul has got to be this! This gel liner is ALLLL OVERRR the beauty world & for a GOOD reason. Smooth, creamy, matte, blackest black and long wearing liner are a few things I can say after using this a few times already. Inglot is only sold in Montreal in Canada (or online) so I’m SO happy I picked this up in America. Full Review to come! (Purchased from Macys)

...And I’ve already started putting together another USA wish list (It never ends!).

 Have you tried any of these products? What's on your America Beauty Wishlist?
Read Full Post...

Artist Brushes | Dupes for Eye Makeup Brushes

Saturday 9 August 2014


Did you know you can use Artist or "Paint" Brushes as eye-makeup brushes? Oh, YES, you can! My other eye brushes have literally taken a backseat ever since I've got these babies in my life. Artist brushes are EXCELLENT dupes for higher end "pricey" eye brushes. Same great quality (if not better) without breaking the bank. Now, I don’t think artist brushes can replace every makeup brush for your face, but it definitely can replace a few for your eyes!

A single, high quality eye brush can be very pricey and the “cheaper”, lower end ones tend to be really flimsy. Artist brushes are MADE for the precise & detailed work of an artist. These brushes are nowhere NEAR cheap! I am so impressed that they out-perform some of my other eye brushes. These brushes are really high quality, precise, sturdy and soft. Even after washing them several times, they have not lost any bristles or their quality.

From Left to Right: Artist Loft Scrumbler #8, Artist Loft Mop #2, Simply Simmon 5/0  Spotter, Simply Simmons 1/4 Angle

WHERE TO BUY?


I bought my brushes from Michaels' which is a Arts & Crafts store here in Canada and the States. Artist brushes should also be available at any other arts and crafts store as well. Michaels' carry a HUGE selection of brushes! I’d recommend shopping when Michaels' has a sale (they do very often) and take advantage of their COUPONS! (there's always an active coupon, check here). The “regular” price range is $1.99 to $15.99 CAD for a single brush depending on the brush & brand. With discount/sale/coupons, each brush cost me around $1 to $7 CAD (TOTAL STEAL!). I love that when shopping in-store you can touch & feel each brush, compare them and find exactly what you are looking for.

 PS. I had trouble finding decent links to purchase these exact brushes online, therefore I'd recommend just browsing your local Art store for them (Apologies!).

So here we go! These are my current top 4 Artist Brushes:

Flat Angled Brush: 


Simply Simmons 1/4 Angle:


This brush has made WINGED LINER POSSIBLE for me! Not even kidding, I have always STRUGGLED with winged liner & thus would never dare to attempt it, but this brush makes it SO easy. The brush is sturdy and stiff yet the bristles so soft - no tugging!The angle is perfect for creating a sharp and precise wing. I also like using it for lightly defining my eyebrows and filling them in. You can achieve the most defined brows with this brush because of the angle. the  As you can see below, the Simply Simmons Angle Brush is SO fine and flat compared to the Real Techniques Brow Brush.

Left: Simply Simmons 1/4 angle brush | Right: Real Techniques Brow Brush

Fine Eye-Liner Brush:


Simply Simmons Spotter 5/0:


 Every other “ultra-fine-precise-pointed” eyeliner brush I’ve ever owned has basically LIED TO ME or they were really meant for a GIANT. This brush is by far the most FINE & PRECISE pointed brush I've ever used. It does look "pointy and prickly" but it is actually so soft and glides on so smoothly when used. It is absolutely perfect for achieving a very thin line (especially for the inner-eye) and also great for drawing out a winged line. You can see below just how incredibly fine & pointed this brush is in comparison to other "eye-liner" brushes I own.

Left: Simply Simmons Spotter | Center: Real Techniques "Pixel Point" Eyeliner Brush | Right: ELF angled eyeliner brush

Blending/Crease Brush:


Artist’s Loft Scrumbler #8:  


Perfect brush for crease work and blending. Other “crease” brushes are far too big, get all over and make things messy. This one is perfect just to concentrate on the crease and blend it in beautifully. It is slightly tapered and not at all “floppy”. This is especially perfect if you have "smaller" eyes or not a lot of lid space to work with. For comparison, you can see below that the Real Techniques "crease" brush looks absolutely ENORMOUS next to the scrumbler brush.

Left: Real Techniques Crease Brush | Right: Artist Loft Scrumbler #8

Eye-shadow Packer Brush: 


Artist’s Loft Mop #2: 


This brush is great for packing on colour on the eyelids. It isn’t too big, so you place colour exactly where you want it. It picks up powder shadows really well for easy placement on the eyes. It is perfect for an all-over lid colour or just to concentrate colour on 1 spot. Just like all the other artist brushes mentioned, the bristles of this one are also very soft yet not at all flimsy. You can see below that the mop brush is a lot smaller in size in comparison to the Real Techniques eye-shadow brush.

Right: Real Techniques Eye Shadow Brush | Left: Artist Loft Mop #2


Without a doubt, I'd recommend Artist Brushes as dupes for eye brushes! Have you tried them?

Read Full Post...

How to Research Beauty Products Before Buying

Monday 28 July 2014


Gone are the days of regretful, impulse buys! Up until 3-4 years ago, I was a total impulse or “blind” beauty product buyer! I’d just obliviously walk down the beauty aisle and pick up items on sale, ones I’ve seen in ads or whatever was recommended by makeup artists/friends. No Research whatsoever. I definitely wasn’t the smartest beauty shopper… My drawer of countless unused products accumulated throughout the years speaks for itself.

Slowly but surely, I have become a much more “smarter” and well-informed beauty shopper.  Now, l research the HECK out of any beauty related product before buying it. The handy, dandy internet has made this oh-so-easy.  There are several online resources out there that have become my go-to sites for beauty product research.  By doing ample research, I am more likely to find a product that will work for me and that I will end up LOVING. This has saved me money and the agony associated with regretful & wasted products.

Below are my top tips and tools  to do quality & trustworthy research before making any beauty buys.

1. MAKEUPALLEY (link)


Where would I be WITHOUT THIS?! I’m pretty sure EVERY makeup junkie & beauty blogger alike are well aware of this website by now This is my #1 go- to site for trustworthy reviews of beauty products (from makeup, skincare, hair care, etc.). It has MILLIONS of reviews of literally almost every single beauty-related product out there! The reviews are written by average, everyday consumers for FREE (NOT paid/sponsored). I would say this site has the most HONEST & RAW reviews I’ve seen (possibly because there is no third party interest). The review is written at the full discretion of the user and the rating scale is between 0-5.

Navigation is SUPER EASY-- you can search by brand, category or product name. You can filter and sort reviews by age, skin type, skin tone, hair colour, eye colour and so on.  You can also browse the “highest rated” or “most reviewed” products for each category or brand. Example: MAC> Blushes> Most Reviewed> Highest rated> Olive Skin tones = x number of blushes. I personally consider products rated at least 3.8+ worth checking out. FYI, you must make an account on makeupalley (it’s free) to have full access to the product reviews.

Makeupalley - subjective, trustworthy reviews of beauty products

2. BEAUTYPEDIA (link)


Beauty + Encyclopedia = BeautyPedia (In case you didn’t catch that). This was a recent discovery for me but an absolute LIFE CHANGER! Both Makeupalley and Beautypedia are alike in that they “review” beauty products from well-known brands. What’s completely different is the “how” or the method to review the products. Makeupalley is based on subjective, personal experiences whereas Beautypedia is written objectively by a Research Team. They rate the products based on ingredients, formulations, packaging, stability, effectiveness and so on. The reviews are trustworthy as they are based on scientific research/peer-reviewed journal articles.

Want to know if a certain product will live up the claims it’s being marketed as? Whether it’s “safe” or contains harsh ingredients/fragrances? Then this is your site! I rely on Beautypedia mainly for skincare reviews rather than makeup (because the skincare world is a lot more confusing & makeup is more personal). The rating scale varies from poor, average, good, best or “best of the best”.   You can search for a specific product or browse through products of a certain brand/category. One of my favourite ways to use this site is to browse through the “best” or “best of the best” products of a category or brand to find new & effective products worth checking out.

Beautypedia - objective reviews of beauty products based on scientific research


3. COSMETIC INGREDIENT DICTIONARY (link)


Want to know if a cosmetic ingredient is safe or effective? With one too many websites out there saying this & that about cosmetic ingredients, it’s hard to find a reliable source. This Cosmetic Ingredient Dictionary also run by Beautypedia or Paula’s Choice is my go-to, trustworthy resource. Just like Beautypedia, they draw from scientific research and rate ingredients using the same poor, average, good and best scale. It’s a great tool to know the purpose or efficacy of a certain ingredient, how safe it is and to be aware of some of the “best” ingredients to look for when shopping. It’s also very user friendly and easy to browse.

Cosmetic ingredient Dictionary - rating, safety and effectiveness of hundreds of cosmetic ingredients

4. TEMPTALIA (link)


Temptalia is an absolute GEM! It is an “everything-in-one” website. Temptalia has countless reviews, a foundation matrix, a swatch gallery, a dupe list and more. It has reviews of almost every makeup product out there (old, new, limited edition, collections, etc.). The Foundation Matrix is a helpful tool to pinpoint your foundation shade and find your match from hundreds of other well-known brands. The Swatch Gallery makes it SO EASY to find every single swatch out there and compare them side by side. Awesome tool for comparing foundation or concealer shades for example.  If you’re looking for dupes of higher end brands, you can find it all on the Dupe List without going through several google searches.Bonus: the image quality of swatches & try-on's is very HIGH!

Temptalia - countless reviews, swatch gallery, dupe list, foundation matrix & more


5. YOUTUBE, BEAUTY BLOGS, GOOGLE IMAGES & SOCIAL MEDIA


 The OBVIOUS. This goes without saying, as most if not ALL of us already do this. There are so many beauty vloggers & bloggers out there that do in depth reviews on beauty products and you can actually see them used in action. Social media (Instagram, Pinterest, Facebook, Twitter, etc.) is another great way to find snippet reviews and images of how a product looks or works on someone. I’m also constantly google-imaging keywords to find how a certain product might work on someone with similar skin tone or hair colour to myself. Example search: “MAC All Fired Up Lipstick on NC42, olive skin tone”.

6. SAMPLES & TESTERS 


Another obvious but important tip. Get samples when you can! Most makeup counters give out free samples, so don't be afraid to ASK. It's always best to test a product out first in order to make an informed & confident purchase and to avoid disappointment. You can test the longevity of wear, the texture, how it looks in different lighting, etc. Testers are also available in most makeup counters, but be sure to always ask the assistants to disinfect it first. If they can't disinfect it, do not use it! If you can't get a sample or a (hygienic) tester, then I'd go back to Tip #4 or #5 and search for reviews/images,etc. of how a product would work with someone of your skin tone or whatever it may be.

7. READ NEGATIVE REVIEWS TOO


Don’t be biased! Isn’t it true that when you really, really want something you focus only on the good in it and ignore the “not-so-good”? Like that 2000 calorie, triple, fudge, caramel chocolate cheese cake topped with whip cream?

 Well, same goes for beauty buying! You might tend to read ONLY the positive reviews and turn a blind eye to the negative ones, when you’re convinced you need that certain beauty product in your life. But, detailed negative reviews can be helpful too - if it just so happens to relate to you. For example, perhaps the reviewer gave a negative review because the product didn’t work with their oily skin or coarse hair (which MAY or may not relate too).  So just to be sure, it’s best to skim through some negative reviews that you may come across (no need to actively search for them). Obvious rule of thumb: If Positive reviews > Negative reviews = Worth checking out. 

8. DON’T FALL INTO THE HYPE


So everyone and their MOM are RAVING about a certain beauty product? Now, you’re determined you must have this ultimate, god-sent product in your life?! (Anastasia Contour Kit? Kevin Aucoin Sensual Skin Enhancer?) Yes? A little dramatic but YES… some of us DO feel the pressure of the hype. Just, remember to TAKE YOUR TIME & DO YOUR RESEARCH FIRST, before you get swept into the hype and buy it on the whim.


SUM IT UP:

  • Makeupalley - subjective reviews; personal experiences. I use it for all beauty products.
  • Beautypedia - objective reviews; scientific research. I use it mainly for skincare.
  • Cosmetic Ingredient Dictionary - purpose, efficacy and safety of ingredients; scientific research
  • Temptalia - Personal reviews, foundation matching, swatches and dupes.

& That’s that! I no longer hit beauty aisle without doing my research first. I may do some sneaky impulse beauty buys now & then but for the most part, I always research, research & research!  
More Research=Less Disappointment/Regrets=More Loves! 

What are your top tips before hitting the beauty aisle?! 

Read Full Post...

Drugstore Eyeliner Picks

Monday 7 July 2014

drugstore-eyeliners

Its funny how drawing a black line on my eyelid just makes me feel so much better #MakeupProblems 

Eyeliner is an absolute essential for me, as is for most girls. It can thicken your lash line, define & enlarge your eyes & you can use them to add a pop of colour too. You don't need to spend big bucks to get a quality eyeliner. The drugstore or “lower-end” brands as you may call it are full of GEMS that are comparable to higher end brands. The first makeup product I ever bought was an eyeliner and of course from the drugstore. I still continue to use drugstore eyeliners and a few higher-end ones too as some are just as great.

 I’ll be going over the 4 drugstore eyeliners that I'm currently using. Some are total gems, while others just about cut it. I use 4 different types of liners– a gel liner, a liquid liner, a felt tip liner and pencil liner--  cause well, you can't have too many eyeliners, right? I use a different one depending on my mood, the look I'm going for and the amount of time I have. These eyeliners are all BLACK because they work best with dark hair & tan. I do need to get out of my comfort zone and try more colours though. Don't forget to have a look at the swatch comparisons at the very bottom. Any who, let's start:

Jordana-Fabuliner

1. Jordana Fabuliner Bold:


An extremely easy to use felt-tip eyeliner pen. Depending on how you angle it, the felt tip point makes it so easy to draw on a thin or thick line all in 1 go. I reach for this liner when I’m short on time but still want to line my eyes. The tip also makes it easy to wing out your liner. I’ve had this for about a year and it is still going strong and has not dried out. The Fabuliner also comes in a finer tip too that just goes by the name “Fabuliner”, but it is sold out most of the time.  PS. Canadians, I picked this up from the States as it’s not available here in Canada (Yup, yet another brand we are deprived off!). A few cons are that, it is not very pigmented compared to other blacks (see swatch comparison). It also fades away fast and rubs off easily. So it just about cuts it for quick use-- but it's not my favourite.

Maybelline-Gel-Liner

2. Maybelline Eye Studio Lasting Drama Gel Eyeliner:


Who HASN'T tried this one yet? It is THE drugstore’s most sought after & popular gel-liner. This one is said to be comparable to higher end brands like MAC, Bobbi Brown & Inglot. It is truly the blackest black with a matte finish. The creamy, gel formula glides on smoothly. It also doesn’t dry out fast and the amount of product it comes with, just about lasts forever. I’ve had mine for maybe 2 years, used a heck out of it and still got a A LOT left. But I do have a problem with this liner-- it takes a while to set. If you don't wait, it will smudge off easily. Once its set and on, it will stay on throughout the day with minimal fading. The best way I love to use this liner on my waterline & to tight-line because it lasts SO much longer.

Loreal-extra-intense-liner

3. L’Oreal Extra Intense Liquid Pencil:


The “liquid-pencil” part got me! It is one of the smoothest, creamiest eye-pencils I've used. Some other pencils from the drugstore can be so rough and hard. It is a true black but needs to be built up to get it even darker. The pencil sharpens easily and doesn’t break or melt either. The only con is that there is a bit of a smudging problem when used on my (oily) eyelids as it doesn’t always stay put throughout the day. I like to use this primarily on my waterline/tight-line especially when I’m in a rush as its a breeze to use.

wetnwild-mega-liner


4. Wet n Wild Mega Liner:


 One of the BEST drugstore liquid liners! I generally stray away from liquid liners cause I find them harder to work with. But this one is unlike others. It is the blackest black, fully matte liner with the finest tip. It is smudge proof and dries INSTANTLY (within seconds). It’s perfect for achieving a thin line especially in the inner corners of the eye.  I’d say this is the blackest out of all 4 of these liners and the most long-lasting.The only problem I have with this liner is my clumsy hands that don’t always stay steady when using such a fine tip (but that’s my problem that I’ve got to practice on).  

drugstore-eyeliners
Swatch Comparison

There are SO MANY MORE quality drugstore eyeliners out there. You can find a great one even on a budget. I’d say my favourite has to be the Wet N Wild Liquid Liner, followed closely by Maybelline Gel Liner. On my to-try list is Inglot Gel Liner #77 as I have heard more than enough good things about it!

 What are your favourite drugstore eyeliners?

Read Full Post...

5 Minute Makeup

Tuesday 1 July 2014


There are days when I’m super short on time, but still need to get out the door looking half decent. Those days tend to be my early mornings before work (after hitting the snooze button about 55 times). I do love my sleep, so sleep conquers my makeup time (sleep conquers all really). 

On such days/mornings, I allocate my time wisely -- less than 5 minutes for my makeup and the rest for my hair (a messy bun?!), outfit (chosen the night before) & probably a to-go breakfast. With less than 5 minutes to do my makeup, I couldn’t be bothered with much. So, I reach for products that are really easy to use and do not require a lot of precision, effort or time. These products also really a help a girl that has rolled right out of bed… not quite look like she has. Haha.

Lets Begin! Timer on!


I start with my BASE/FACE. I cannot be bothered with liquid foundations when I'm racing the clock, so I simply moisturize and then go straight in with my MAC Studio Finish Concealer (review) in NW 30. I apply this on my under-eye dark circles and any spots on my face, using my fingers. This is full-coverage concealer and super easy to use. I then grab my MAC Studio Fix Powder (review) in C40 compact . This is a full coverage powder, so I just swirl my brush around the pan and buff in, which evens out my complexion. At this point, I tend to look a little washed out so I add some colour and warmth back to my skin with a touch of MAC Peaches Blush.

Then come the EYES -- MASCARA is my BEST FRIEND! It can transform your appearance in seconds. I apply a couple of coats of L’Oreal Voluminous Carbon Black Mascara. I then grab my blackest black eyeliner currently using L’Oreal Extra Intense Liquid Pencil Eyeliner and tight-line my upper lash line. Now you might be wondering, why on earth would you tight-line when in a rush!? Well, for me applying eye-liner as usual takes serious time and effort to get the perfect line. With tight-lining I don't need to worry about too-thick or too thin of a line, uneven liner or smudging. It does take time to get "learn" tight-lining but takes only seconds once you’ve got it. It makes life easier as it automatically gives you a thicker lash line and larger eyes without the effort. 

On to the BROWS. ELF Eye-Brow Kit (Medium) is a fool-proof brow product! Its a light formula so no need to worry about over-doing it. I dip an angled brush in and fill in my sparse areas. My brows aren't too thin, so this step doesn't take much time. Defined brows instantly frame your face and pull your entire look together in my opinion. I then apply my favourite neutral lipstick, MAC Velvet Teddy (review), and I'm out the door!

& thats a wrap! Makeup done just under 5 minutes. 

 What are your go-to makeup products when in a rush? 
 
Read Full Post...

Persian Cold Wax Hair Remover Review

Monday 23 June 2014

persian-cold-wax-hair-remover

Body hair? – I’ve got lots of it; it’s dark, fine-to-coarse & utterly unattractive… Oh, the tragedies of an Indian Girl. Haha. Unwanted body hair gets the best of us. Unless, you’ve laser-ed it off, we all remove it in some way or another whether at home or the salon. I’ve used a number of different methods & products to remove my unwanted body hair--- waxing always being my least favourite due to the PAIN.

But recently, after reading some rave-reviews I picked up a new Cold Wax that has BLEW MY MIND. No really, I have NEVER used anything like this before. It has AMAZED me like no other and has truly made the once painfully dreadful task of waxing into a semi-pleasant experience (as pleasant as waxing could get?). Let me introduce to you ---Parissa Persian Cold Wax Hair Remover.

PACKAGING


Parissa-Persian-Cold-Wax-Hair-Remover


Lets take a moment to admire the sleek black & gold packaging this wax comes in. It looks so fancy & elegant-- not the least like a typical hair removal product! The kit comes with an 8 oz container of cold wax ("sugar paste"), 2 wooden spatulas and 20 muslin strips. You’ve got everything you need all in 1 box, so there is no need to go out and spend on strips/spatulas/wax warmers.  You should be able to find it at your local Department Store or Drugstore in most countries. It can also be ordered online directly from Parissa or Amazon. I bought mine from my local Walmart for an affordable price around $14 CAD


BUT, what’s so special about this wax, you ask? DRUM-ROLL PLEASE…

PROS


Firstly, it is 100% NATURAL. It’s a formula made only of 3 ingredients--- sugar, water & citric acid – so simple yet so effective. It is essentially a "sugar-paste" and could possibly be made my yourself at home… but after one too many DIY wax disasters in my teen years, I’d never attempt again. Most waxes have fairly long ingredient list--- so a 3 ingredient wax is kind of a big deal.

Also, the wax is WASHABLE and WATER SOLUBLE. All you need is water and the wax effortlessly washes off. You don’t even need soap! Waxing doesn’t have to “sticky mess” with this bad boy. You can wash the wax off your body, clothing, & really anything it gets on.

That brings me to my next point: the STRIPS ARE REUSABLE---No I don’t just mean you can reuse the strip twice or thrice while waxing---rather they can be washed off and are good as new for future waxing sessions. HOW AWESOME?! All you do is: wash & dry. I throw all my used strips in a bowl filled half-way with water, rinse off and then dry on a towel. This is easy on your wallet and environmentally friendly as you don’t have to be continuously discarding the strips and buying new ones.

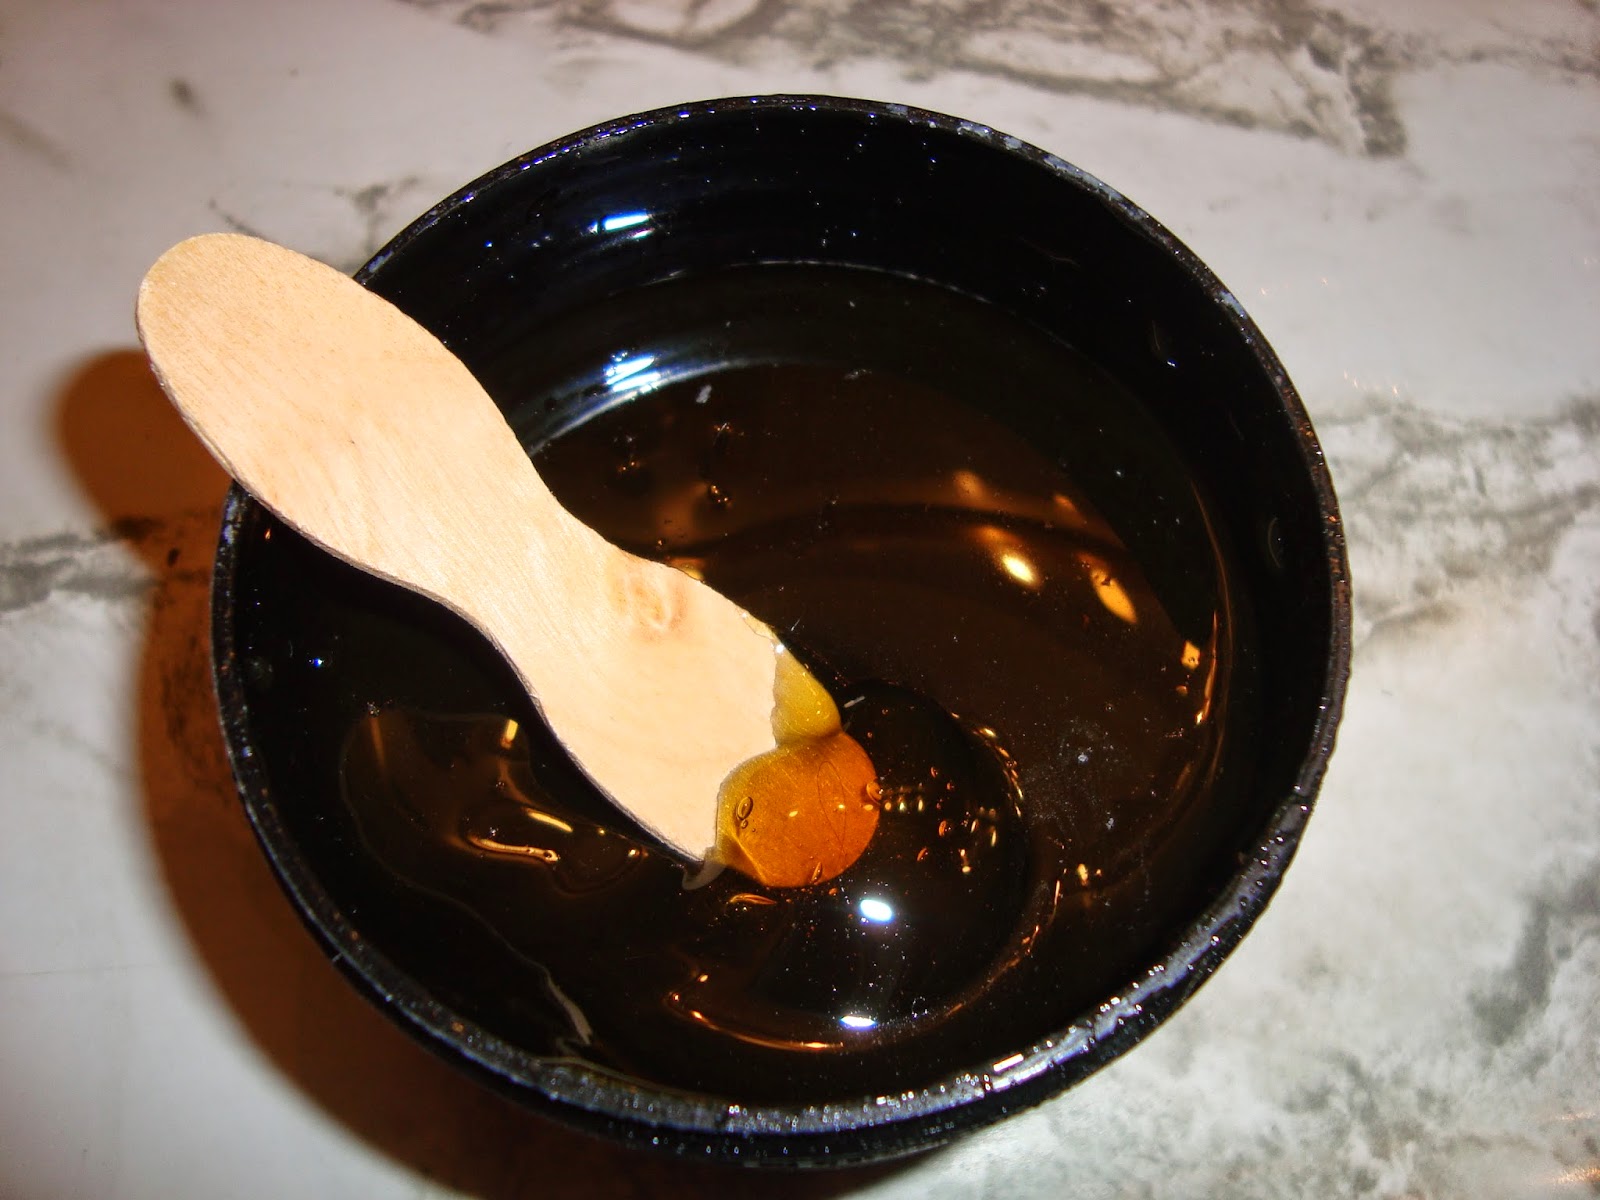
Also, there is no need to worry about burning yourself with hot wax—because there's NO NEED TO HEAT IT! Most waxes need to be heated up in a wax warmer for a couple of minutes, then you've got to wait till it cools down and what not. But, with this you don’t need to fuss with all that as it's ready to use "cold". But, when the wax has hardened due to the temperature I do heat it in the microwave for maybe 20 seconds at the most to get it to the right spreadable “honey-like” consistency.

 HERE THE BIGGEST PRO OF THEM ALL--- A GAME CHANGER!

You will enter a world of waxing with MUCH, MUCH LESS PAIN. I’m not even kidding!! Yes, you are essentially pulling your hair out of its roots—so it’s bound to hurt. BUT, the pain is tremendously lower compared to other waxes I’ve used. Extremely painful, redness, bumps and scars ---- are just some words associated with previous at-home waxing experiences.  With this, you only feel an ever so slight stinging sensation that goes away instantly. There is slight redness but it quickly disappears. This was a delightful surprise and now  I am no longer afraid to wax!

Parissa-Persian-Cold-Wax-Hair-Remover

CONS


Yes, there’s a con --- I guess one product just can’t have it ALL.

This wax is not very effective on “short, coarse, thick, pre-shaven hair”. I used this on my short & coarse under-arm hair that was less than 0.5 cm long and it was NO FUN--  I had to wax the same area MULTIPLE times to remove all the hair!  It’s stated in the instructions that pre-shaven hair is resistant, so it should be waxed when its 0.5 cm or longer – so no surprise. But, who wants to wait it out? I want to wax as soon as my hair is visible! So I’m on the lookout for a wax more suitable for that area.


DIRECTIONS


Very simple-- If wax is too hard then heat it for no more than 20 seconds, apply a very thin layer of wax in direction of hair growth, place the strip & rub, rub, rub. Then, quickly pull in opposite direction of hair growth while staying as parallel as possible to the area.

TIPS


These are some tips I picked up that may make your waxing experience a little more pleasant and effective.

  • Taut/ Stretch on surrounding skin tightly before pulling the strip for best results. For under-arms, pull your arm all the way around your head (it makes a huge difference).

  •  Do not heat the wax for too long –only a few seconds or else the wax will not be adhesive enough to pull out all the hair—remember it is a cold wax and most effective when used “cold”. 

  • Apply a very thin layer of wax or the strip will just pull the extra wax off & not the hair. 

Parissa-Persian-Cold-Wax-Hair-Remover

MY OVERALL EXPERIENCE


The MOST PLEASANT WAXING EXPERIENCE I've had thus far for my arms and legs-- All hair was removed on the first attempt with MUCH LESS PAIN than usual. It wasn’t the best for my coarse & short underarm hair as I had to wax the same area several times to remove all the hair. My arms/legs have fine hair whereas my under-arm hair is much thicker. I'd say this wax works best on fine-to-normal hair, but it's not the easiest to use on very thick, coarse & short hair (it still works but takes more pulls).

 I will definitely repurchase and this will be my number 1 choice to remove most of my body hair until I find something better! I'm surprised that it's not more popular. Natural, Washable, Reusable, No Heating & LESS PAIN=AMAZING!

Do you remove hair at home or the salon & how? What are your favourite products?

Read Full Post...

Summer Sun-Protection Essentials

Tuesday 17 June 2014


Maxi dresses, flip-flops, & popsicles.  Summer is FINALLY here! At last, Good ol’Mister Sun has decided to come down and pay us a visit here in Canada! With 9 months of cold--- we, Canadians, CHERISH our 3 months of hot summer weather. Oh, how I envy any of you with hot weather all-year-long!

 As much I love the bright summer sun & shine, it is so important to be sun protected.  Extended exposure to the sun leads to premature aging of the skin, wrinkles, dark spots, sun burns and even skin cancer. FACT: the sun IS a carcinogen. Even minutes in the sun unprotected can start doing its harm.  And NO sun protection is NOT just for the BEACH---but every day –sun, rain, clouds.

Here are my top 5 essential picks to be sun safe: 

All day, every day! The SINGLE most important thing you can do for your skin is SUNSCREEN, SUNSCREEN & SUNSCREEN. This is NUMBER #1 before all your anti-aging, firming, dark-spot erasing creams and what not. In the past, I have been SO bad & lazy with suncreen—I hardly EVER used it. I really believed it was only for the beach (horrible- I know!). But I upped my game the past year with regular sunscreen use & have noticed a HUGE difference in my skin.  I kid you not! --- Acne scars lightening, hyper-pigmentation decreasing, and a more evened skin tone. None of my creams/masks/exfoliants had a real effect without this (cause the sun was just damaging it on a daily basis).

 Use a sunscreen with atleast SPF 30 or more of broad spectrum protection (UVA and UVB protection).  I prefer mineral/physical sunscreens with either zinc oxide or titanium dioxide as the main active ingredients. As they sit on the skin reflecting harmful rays whereas chemical sunscreens are absorbed into the skin. (Here’s an article on chemical vs. physical sunscreens if you’re interested ).  I use Paula's Choice Resist Super-Light Wrinkle Defense SPF 30 which is a moisturizer + SPF. I've done a short review on this in my Prep and Prime Routine post--- in short I love it to bits!


 I use a different sunscreen for my body--- as I’m picky with what I use on my face (some sunscreens can look shiny, greasy, have white casts, flashbacks, etc.). Apply a broad spectrum SPF 30+ sunscreen to all uncovered body parts-- arms, legs, hands, neck and don't forget your feet in those flip-flops!

If your not sun-blocking the area, then be sure to cover it with clothing (long sleeves, long pants, etc.). On my current must have WANT LIST is La Roche –Posay ANTHELIOS 50 MINERAL Ultra Light Sunscreen Fluid. La Roche Posay are KNOWN for their sunscreens---my brother who is SPF-fanatic SWEARS by them!


Don’t forget about your LIPS! Use a lip-balm with a SPF. I use Maybelline Baby Lips Lip Balm with a SPF of 20. It looks and works just as great as any other lip-balm. I use the shade/flavor Pink Punch and I LOVE it! There are plenty of lip-balms out there with a higher SPF as well.


Protects your eyes + a stylish accessory! I cannot live without sunglasses especially in the summer months. If I ever forget them while driving I will literally drive back home just to get them cause I’m so blinded otherwise.  UV rays can harm the lens, cornea & surrounding tissue of the eyes and lead to problems such as cataracts--- SCARY STUFF. Also, no sunglasses=squinting = wrinkles! So be sure to always wear UV-protection sunglasses when in the sun.  I’ve been lusting over these Classic Aviator Raybans for just about forever!

I’m pretty bad on keeping up with this one myself because I always FORGET! A wide-brimmed hat will have the most cooling effect on your head, eyes and face. I'm not feeling those summery beach straw hats... I’m much more into a sleek wide brimmed black hat like above from Topshop.  This ones Its less “beachy” or "cow-girly" and not too floppy looking. It definitely goes with more outfits and is practical for everyday.

On that note, GO OUT AND GET YOUR SUMMER ON! – but don’t skimp on the sun protection!

 What are your top summer picks and sunscreen recommendations?!

Read Full Post...